Globus
On this Page
- Sign up for Globus
- How to use Globus to transfer data between High Capacity Storage (HCS) and Research Storage (Ohau)
- Using Globus Conect Personal to transfer data between the Ohau and your desktop
Before You Start
Warning
If you haven't already registered for Globus access, please see Globus Registration to set up your account.
Globus is a high-speed, secure data transfer platform that is available to all University of Otago researchers.
It is a great way to transfer large amounts of data between Otago HCS and the Research Cluster Storage (Ohau - /projects), as well as to external institutes.
How to Transfer Data between Otago HCS and Ohau using Globus
If you have used Globus before, this process will look a little bit different than you are used to, so please read ahead. You will need to ensure you are logging in to Globus via your University of Otago login.
Step 1: Log in to Globus
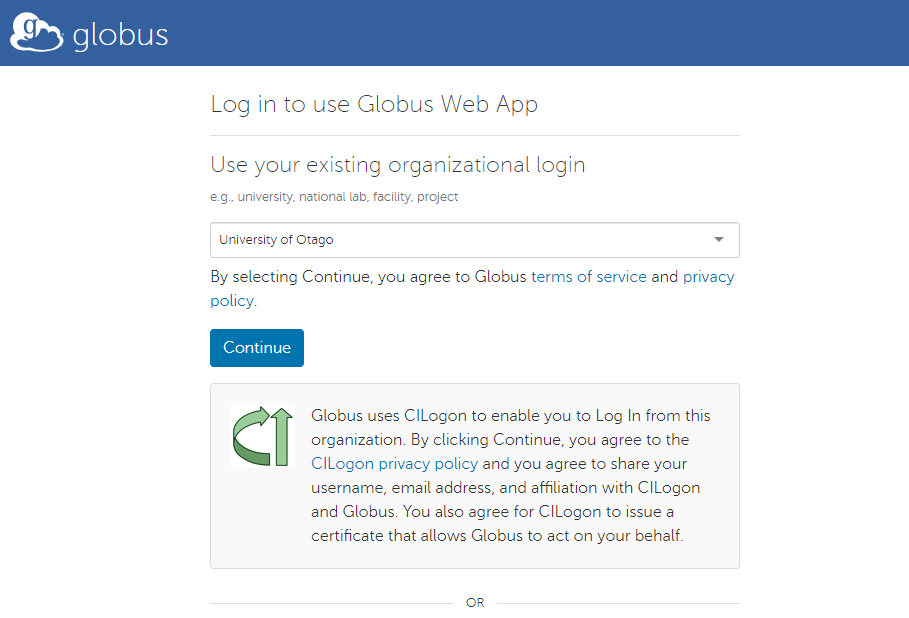
Go to app.globus.org and search for "University of Otago" in the "Use your existing organizational login" section of the page.
This will redirect you to a University of Otago login page and please sign in with your University username and password.
Note
You may be prompted to link any existing Globus identities. Do this if you want to link your GlobusID account with your Otago account.
Step 2: Setting Up the Endpoints
Select the File Manager tab on the left side of the page, and search for University of Otago - RTIS endpoint in the Collection search box.
Note
The University of Otago - HCS endpoint is for off-campus transfers and should not be used for transfers between Ohau and HCS.
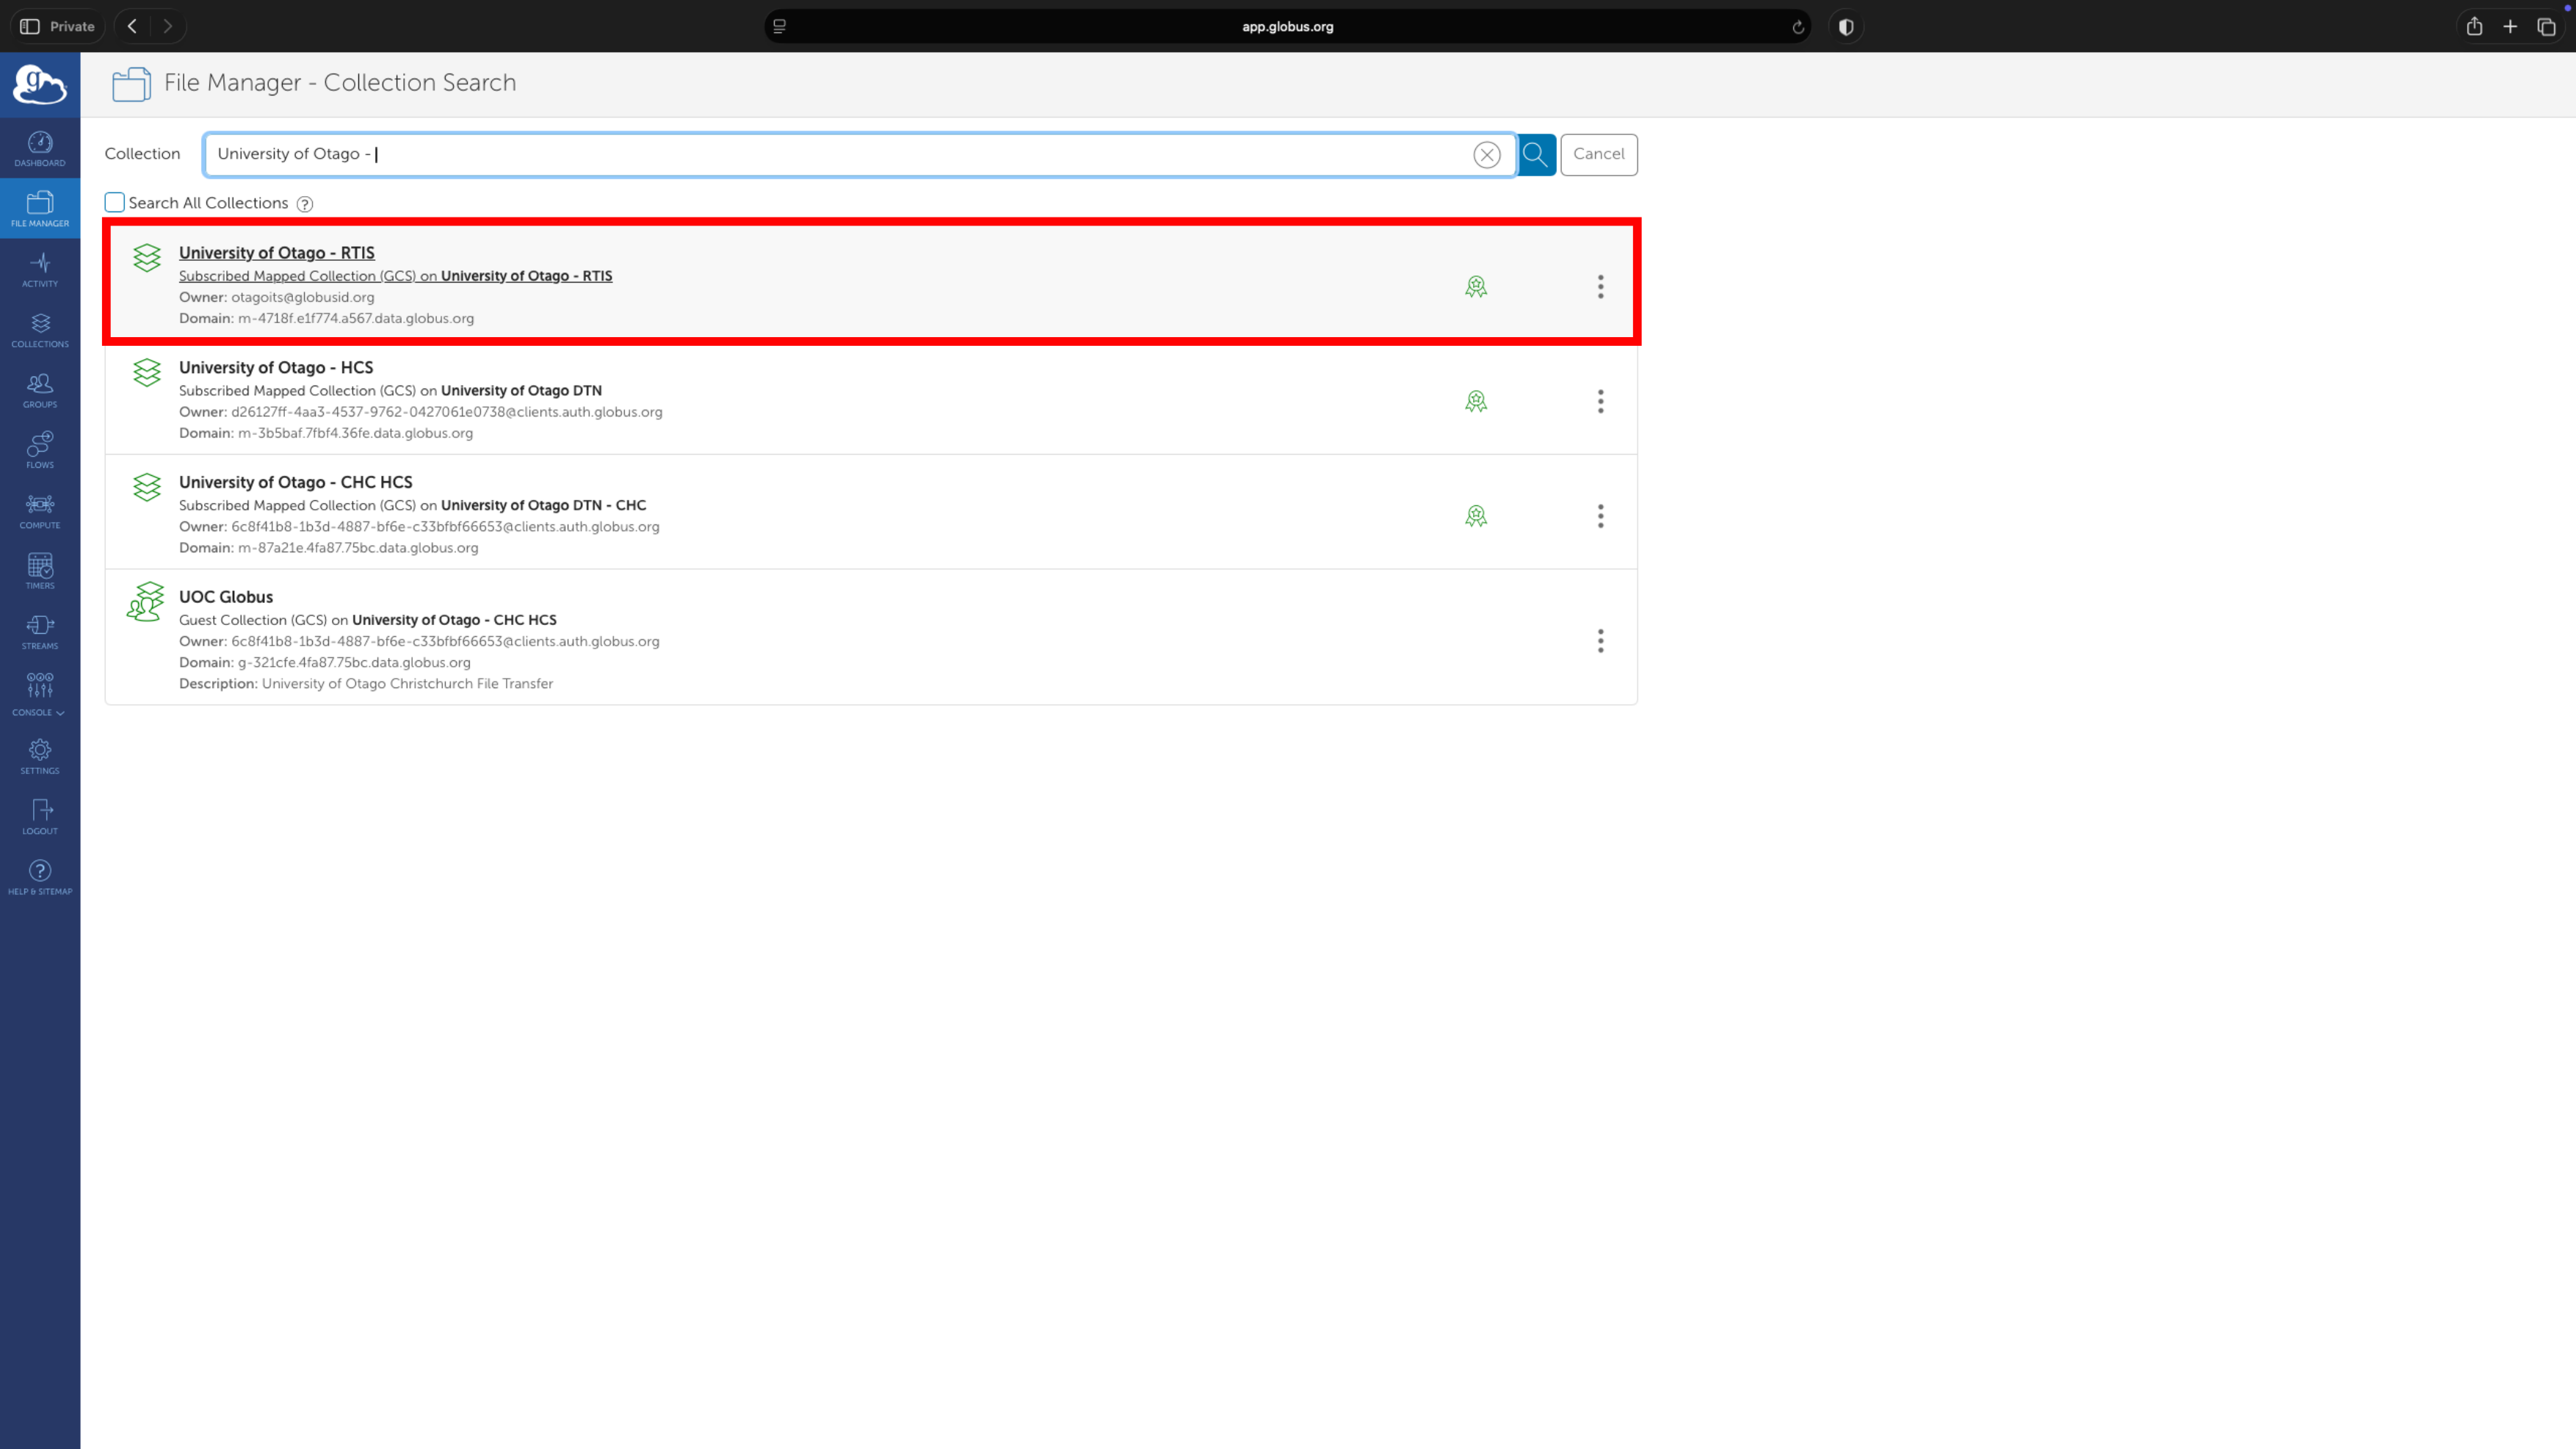
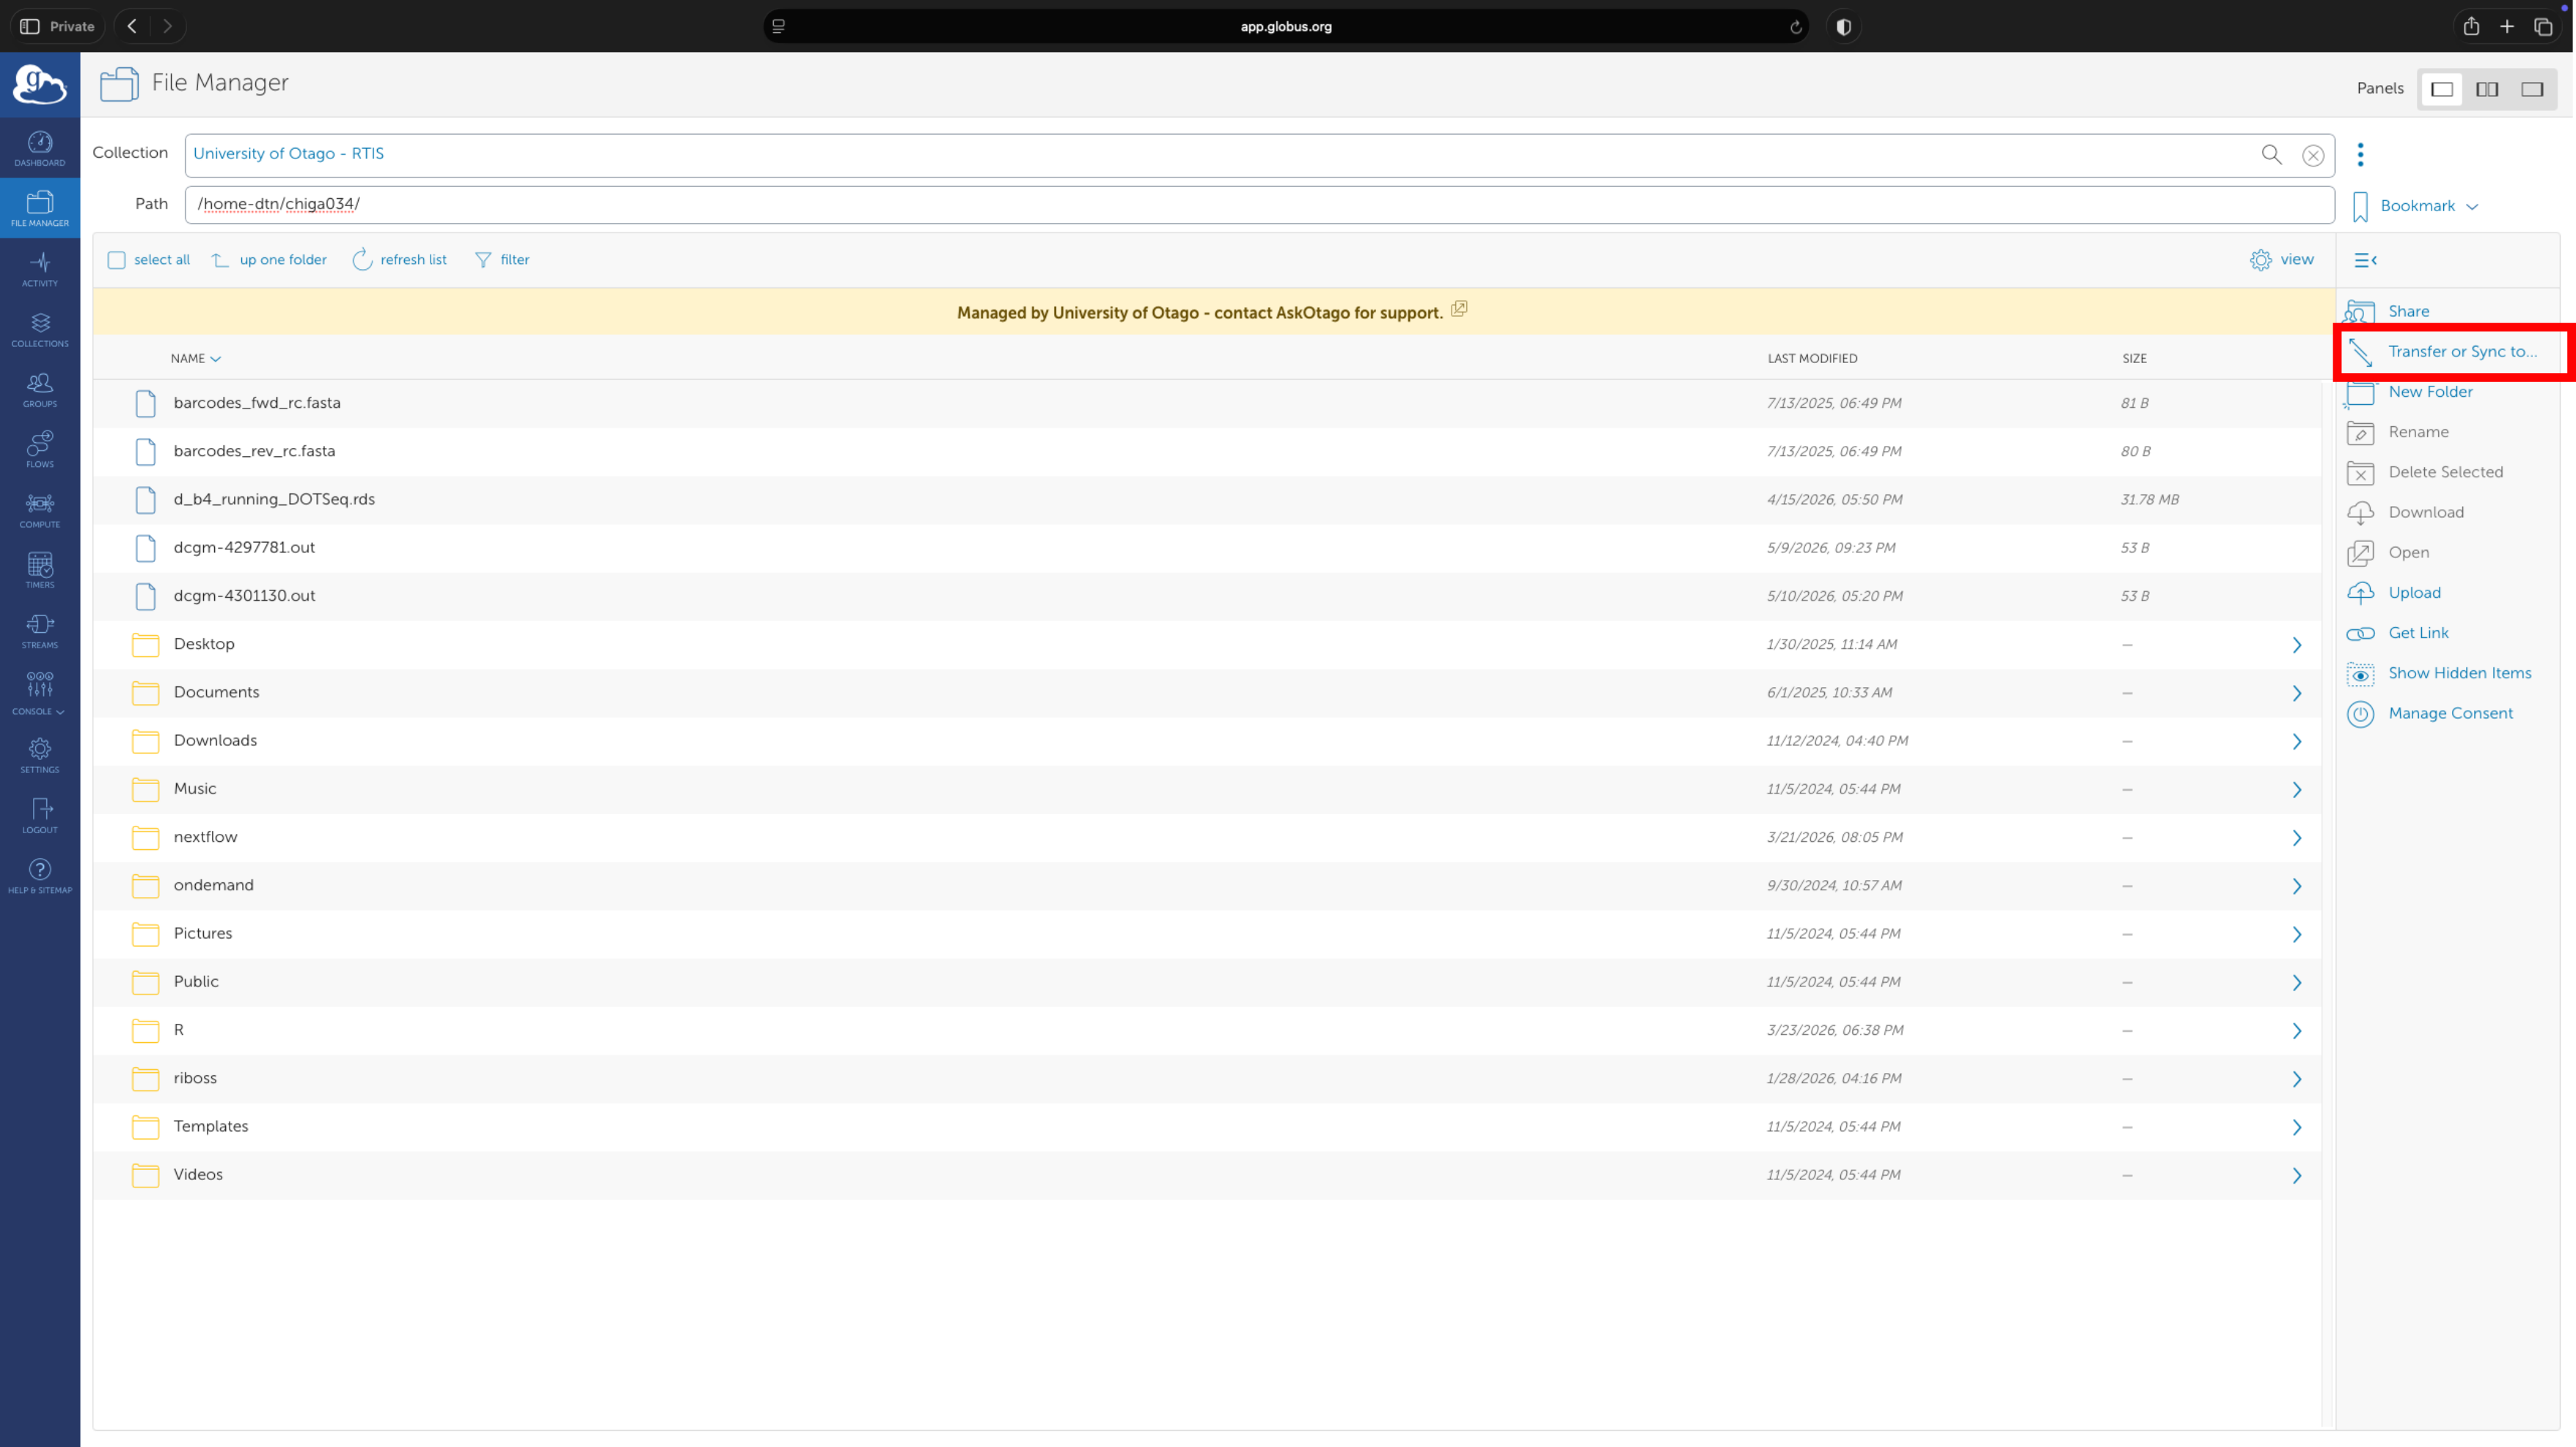
Once the endpoint is selected, you will be directed to the home directory by default.
To open up another tab for the transfer destination, select the Transfer or Sync data tab.
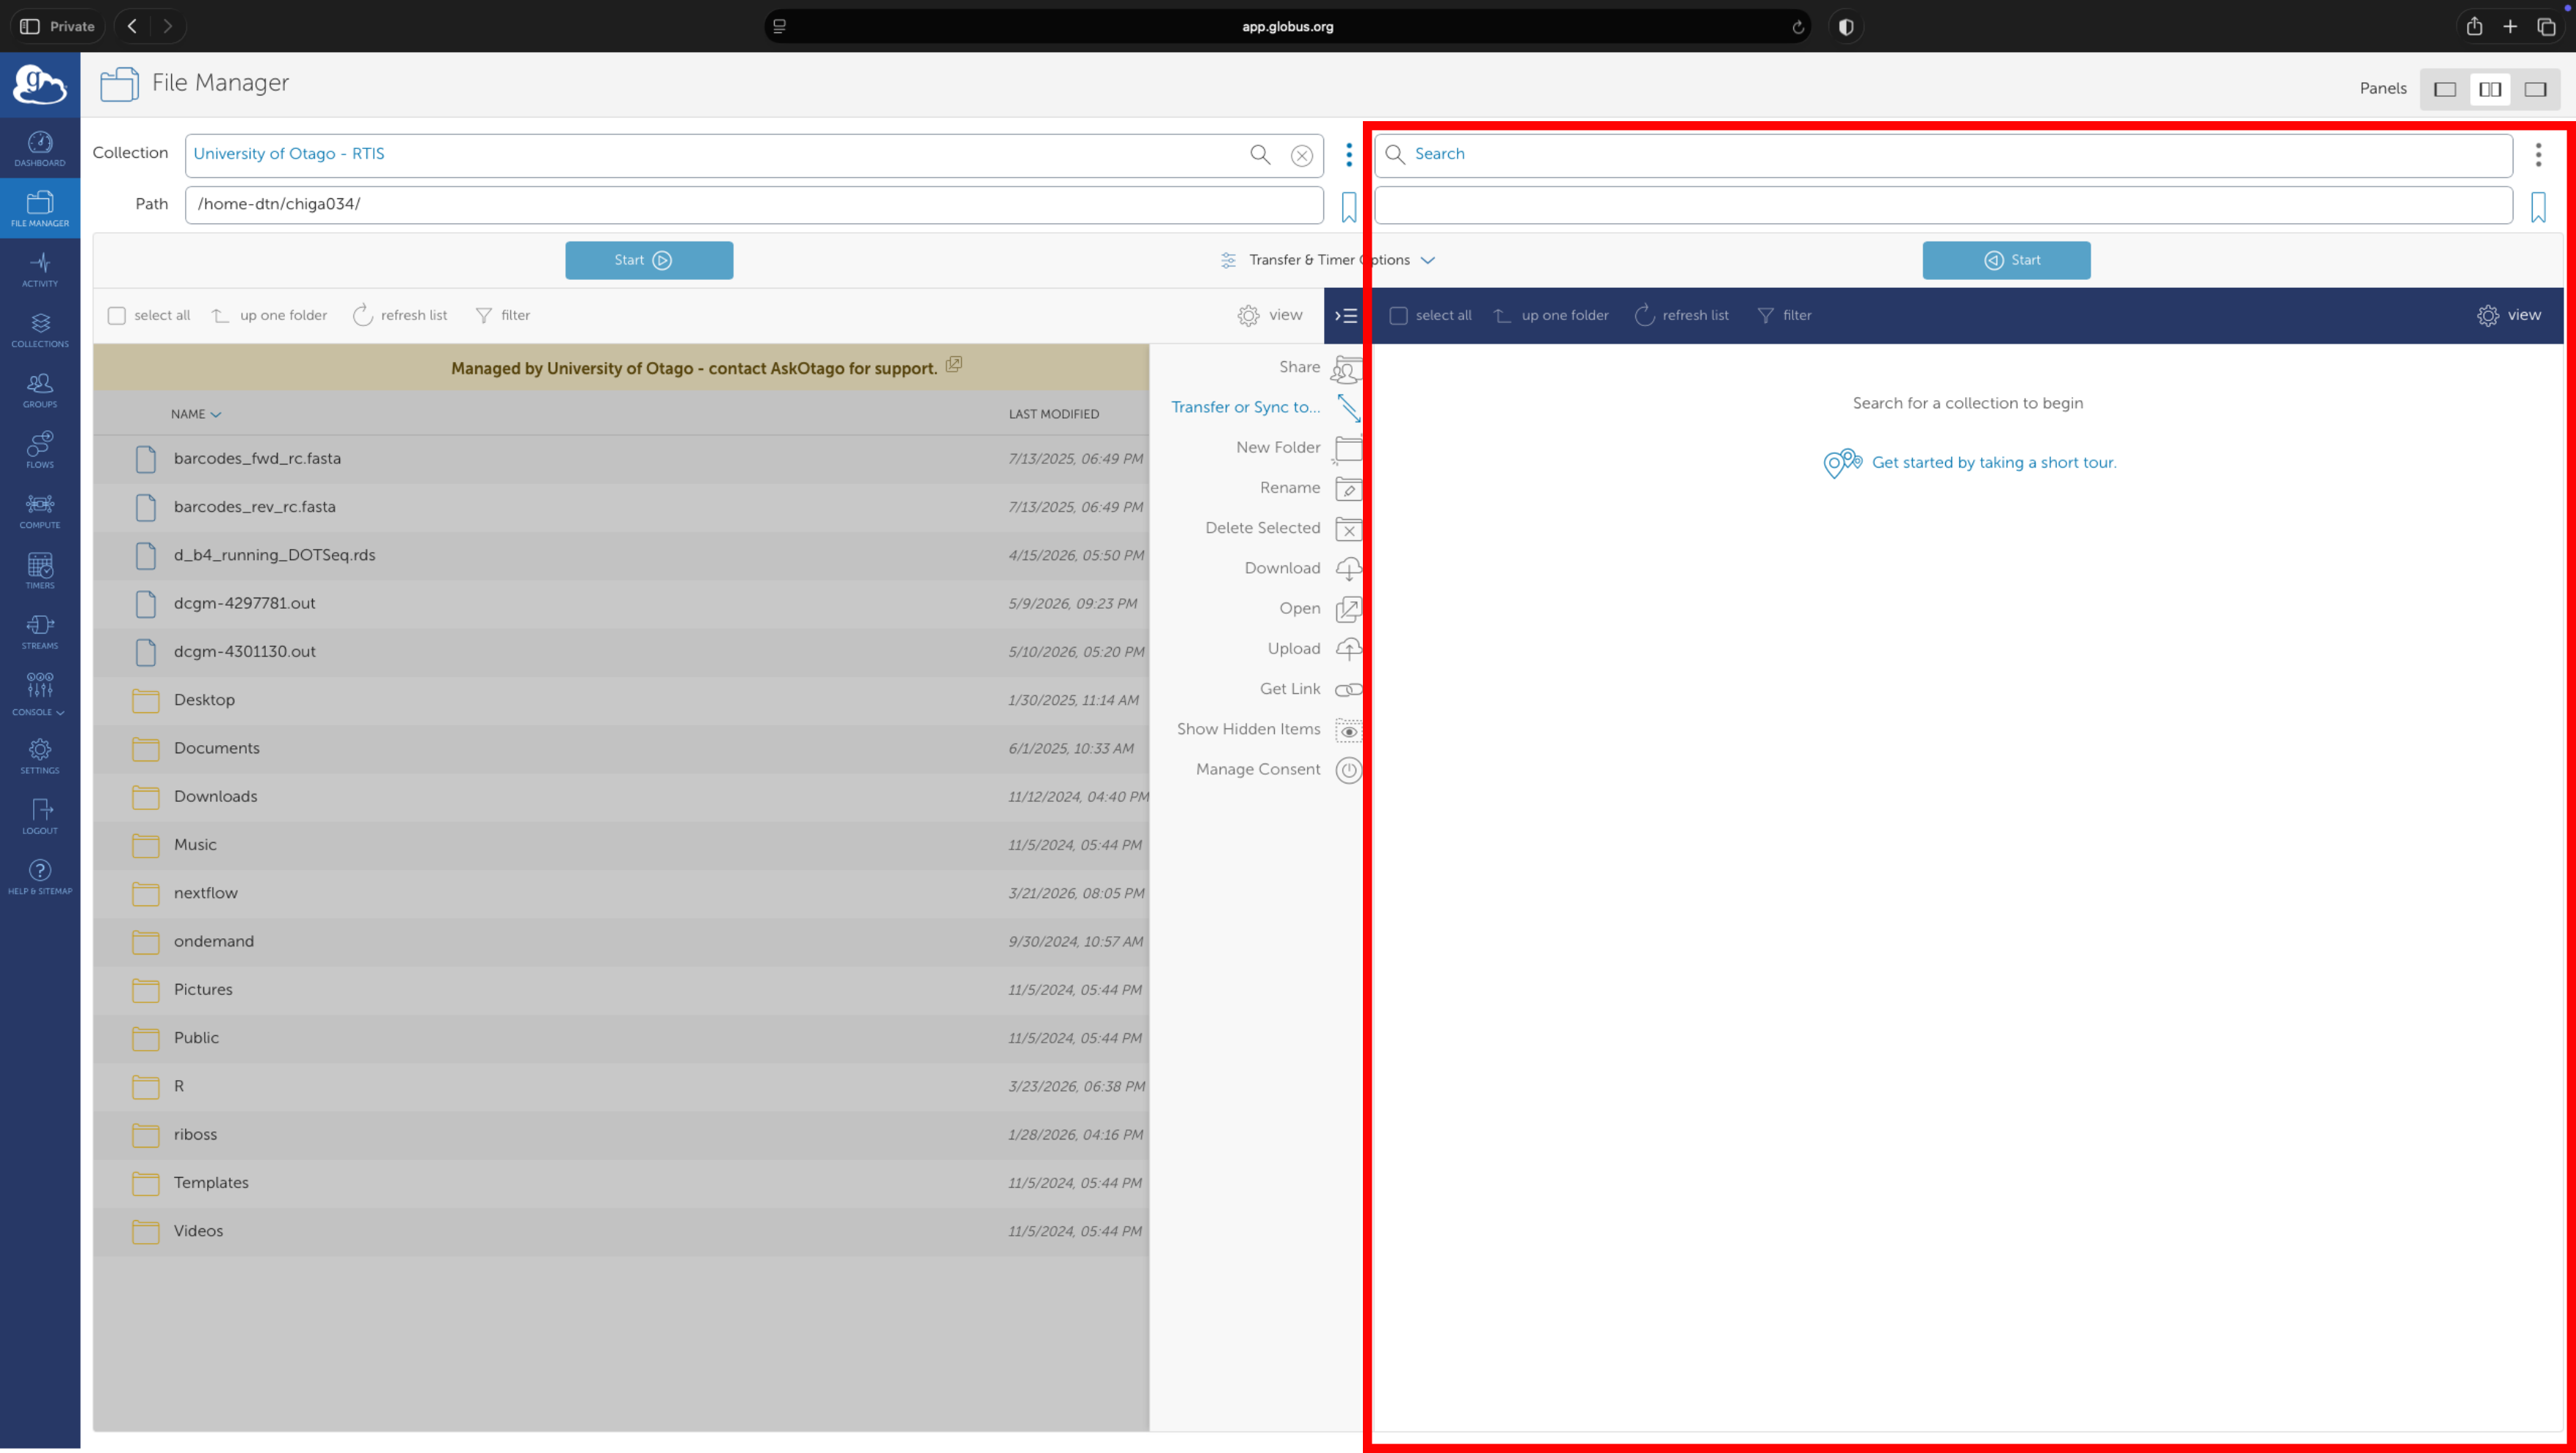
Select University of Otago - RTIS as the endpoint for the new tab as well.
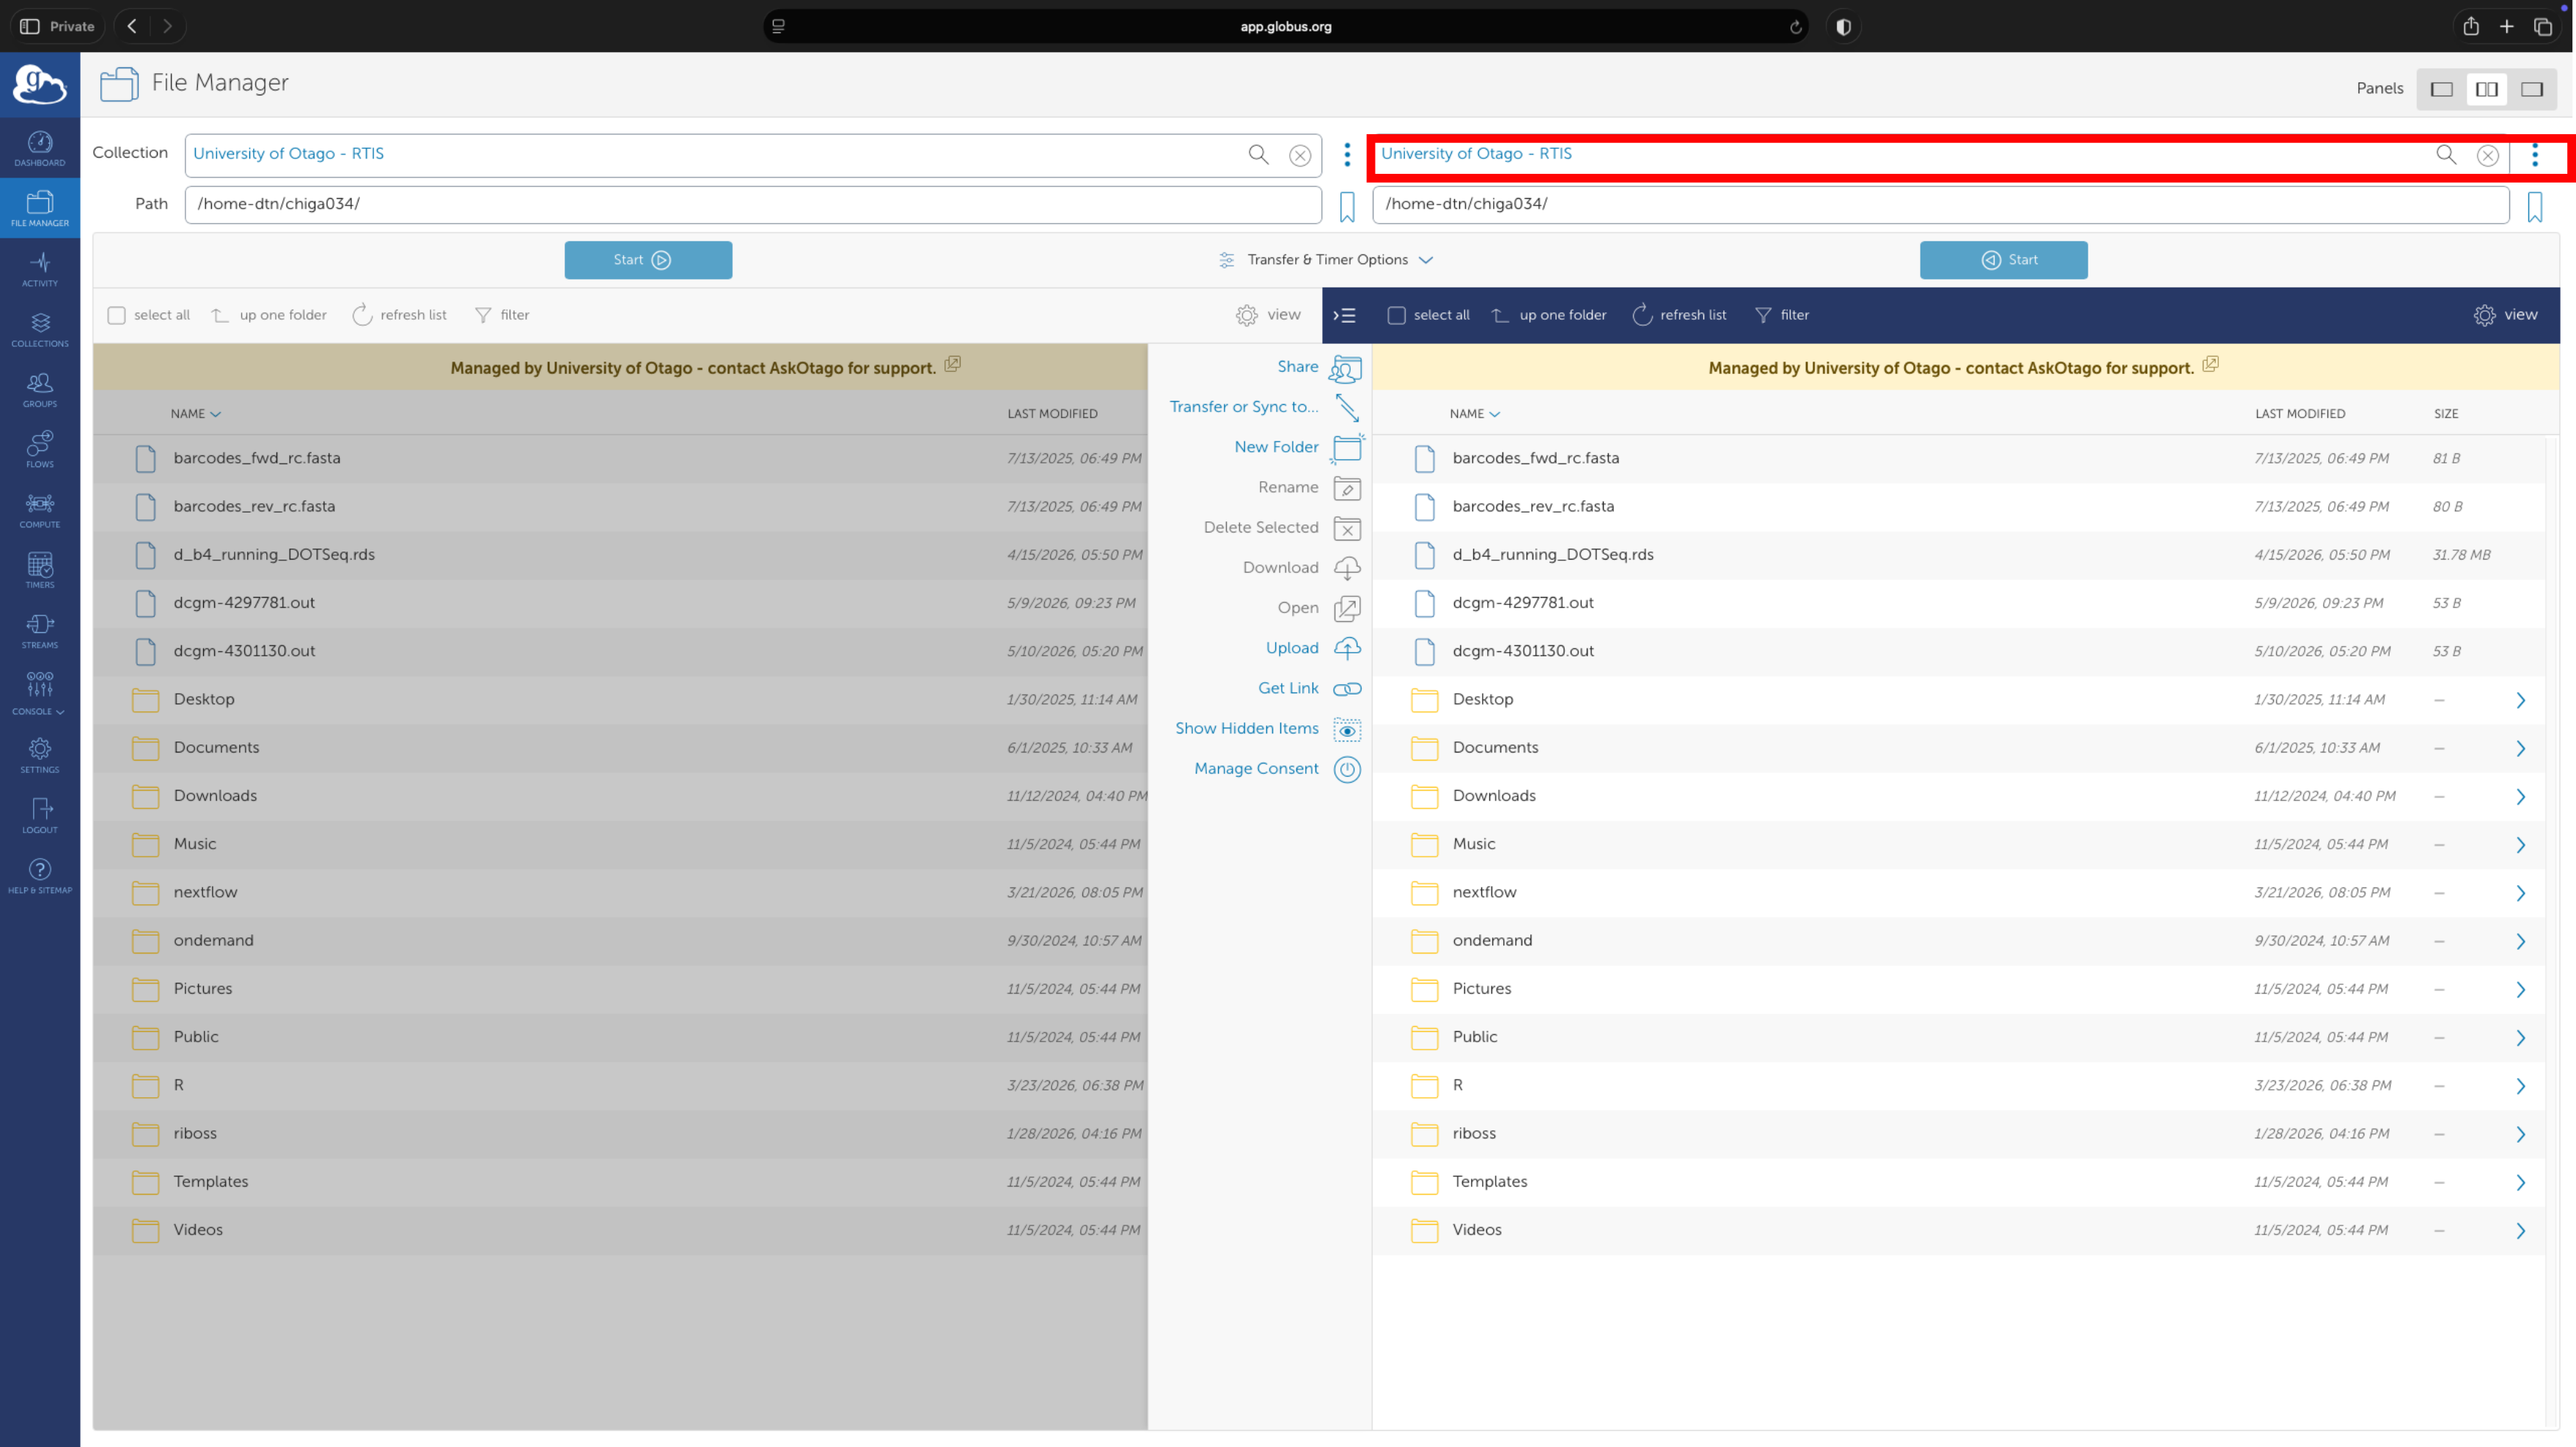
Step 3: Setting Up the Paths for Data Transfers
The path to the Otago HCS and Ohau is different on Globus. Please refer to the table below:
| Directory | Aoraki Path | Globus Path |
|---|---|---|
| Home | /home/<account_name> (~/) | /home-dtn/<account_name> (~/) |
| Projects | /projects/ | /fs/RTIS-Storage/RTIS-Projects |
| HCS | /mnt/auto-hcs/<hcs sharename> | /fs/HCS-Storage/<dtn_username> |
For example, to transfer data from the Otago HCS share to Ohau, the paths for Otago HCS Share is set to /fs/HCS-Storage/ while the Ohau is set to /fs/RTIS-Storage/RTIS-Projects/ and hit Enter.
You should then see the files in your Ohau collection on the right tab as well as the Otago HCS collection (with dtn_
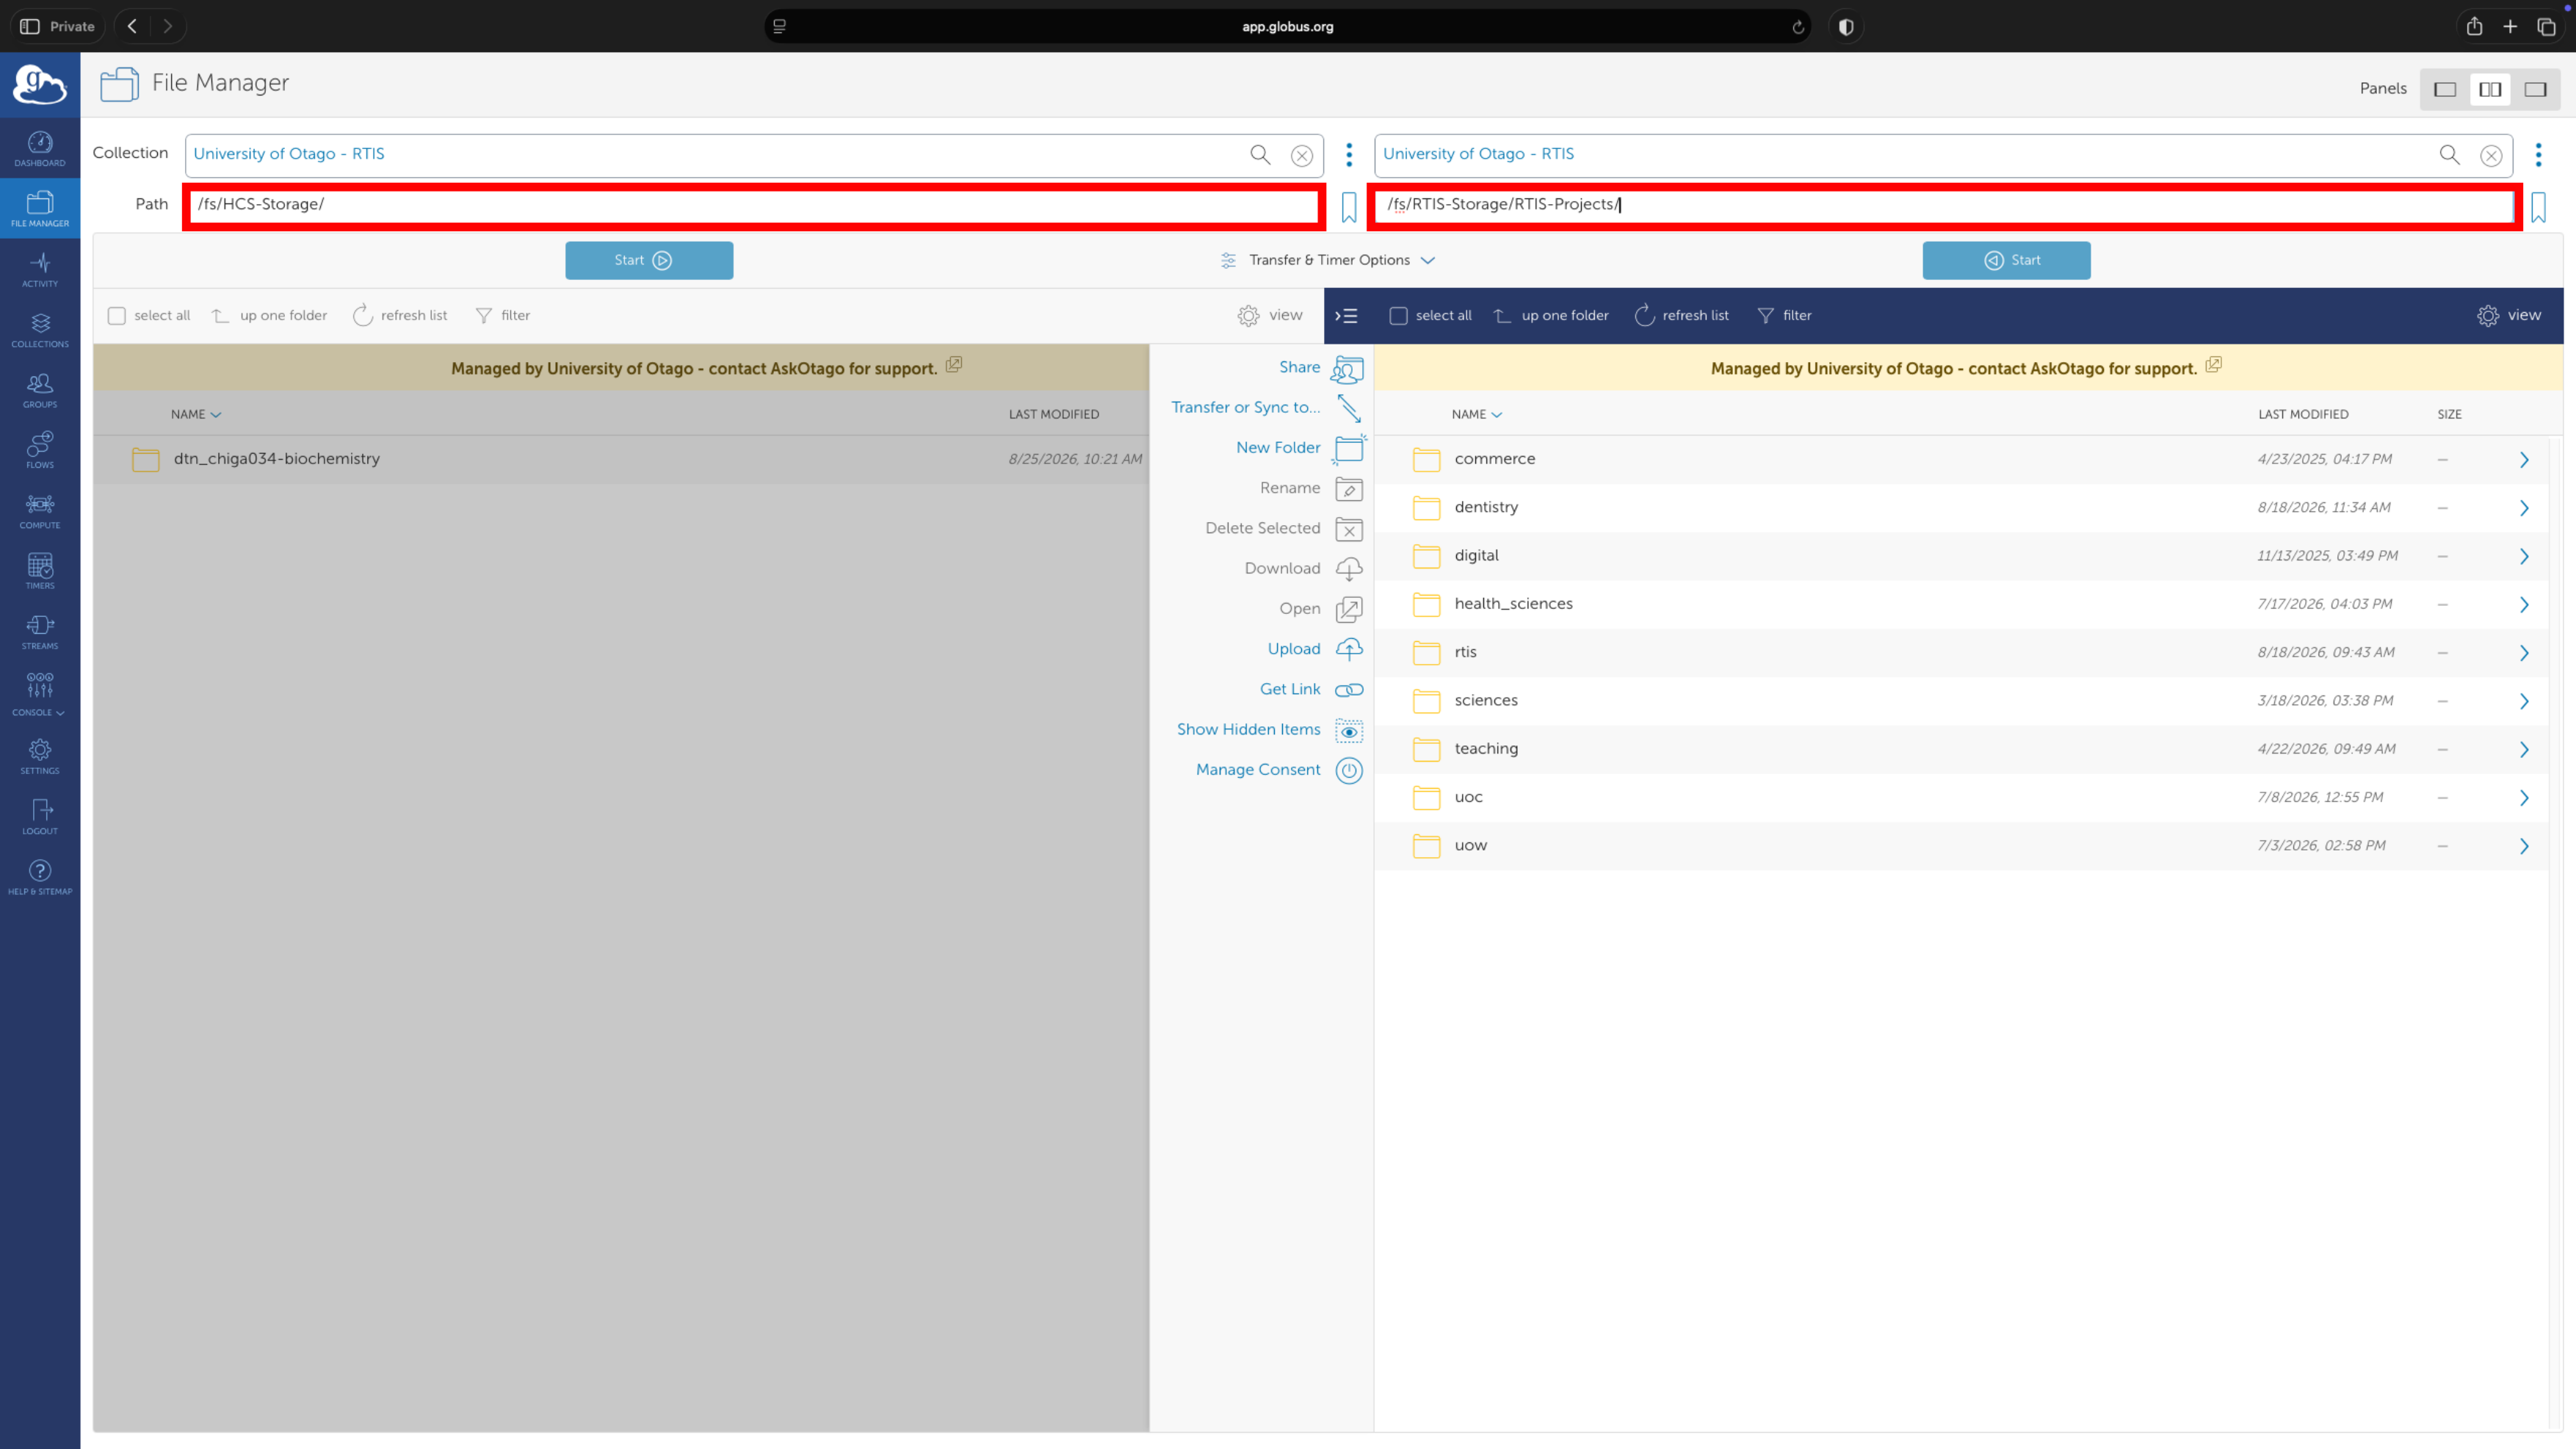
Note
The dtn-sharename may or may not match exactly to the hcs sharename but should be interpretable.
Step 4: The Transfer
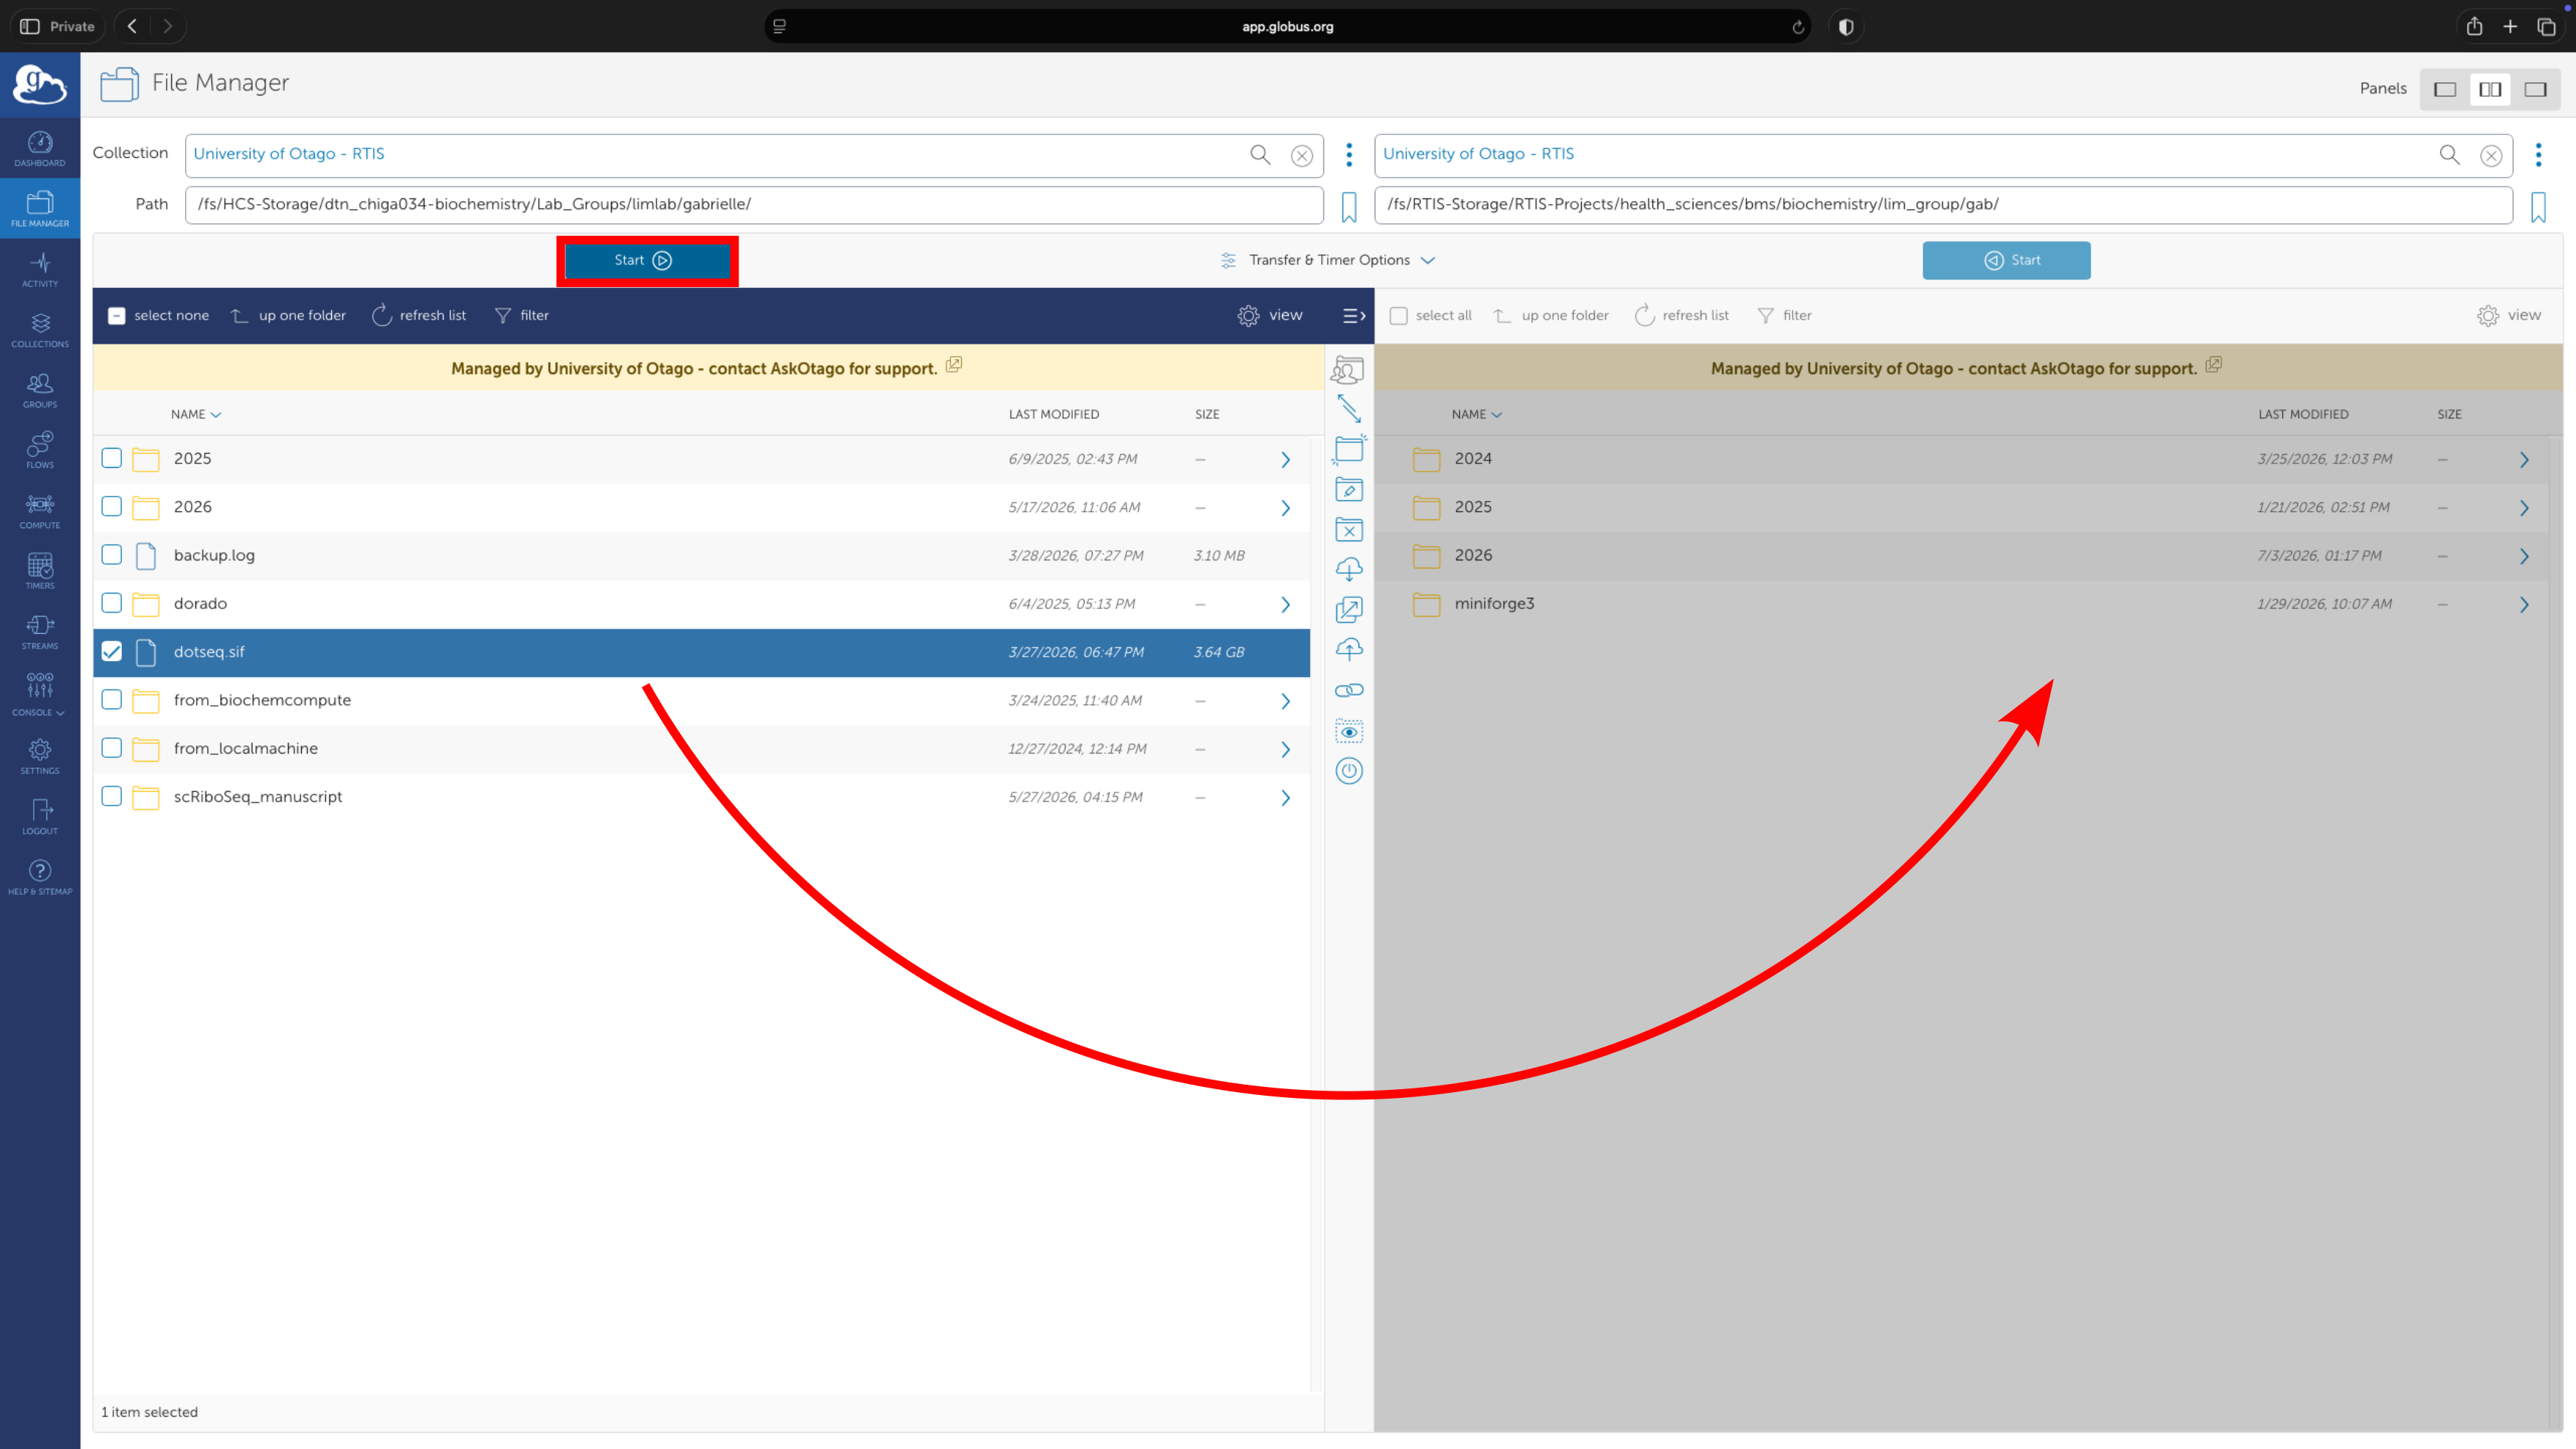
Select the directories or files you want to transfer, then click the Start arrow pointing in the direction of your desired transfer.
In this example, the dotseq.sif file is being transferred from the Otago HCS Share to Ohau:
If you have any issues with Globus, please contact us at rtis.support@otago.ac.nz.
How to Transfer Data between Ohau and Your Desktop using Globus Connect Personal
The University of Otago - RTIS endpoint works with Globus Connect Personal and will transfer data to and from your desktop or lab computer.
To transfer data between your desktop and Ohau, you will need to install the Globus Connect Personal application on your desktop. Follow the instructions on the Globus Connect Personal page to install it.
Once you have installed Globus Connect Personal, you can connect your desktop endpoint to the RTIS Globus endpoint and transfer data between your desktop and Ohau.
Note
Reminder - The University of Otago - HCS endpoint does not work with Globus Connect Personal on campus, but does allow you to share and receive data from other Globus users off campus*