SSH
On this Page
- How to generate an SSH key and register it with Otago OnDemand
- How to SSH through a terminal
- How to SSH with OnDemand
Warning
You can access the Aoraki Cluster using SSH if you are on campus or connected to the campus VPN
Setting up SSH key access
Register your SSH public key to enable key-based authentication to log in to the login node from a terminal. This is faster and required for some tools (e.g. rsync, scp, VS Code Remote-SSH) that don't handle interactive password prompts well.
Step 1: Generate an SSH key pair
If you already have an SSH key pair (typically ~/.ssh/id_ed25519.pub or ~/.ssh/id_rsa.pub on Mac/Linux), you can skip to Step 2.
Windows 10/11 ship with an OpenSSH client. Open PowerShell and run:
ssh-keygen -t ed25519 -C "your.name@otago.ac.nz"
Press Enter to accept the default file location (C:\Users\<you>\.ssh\id_ed25519), then set (or skip) a passphrase.
Using PuTTY instead
If you use PuTTY rather than the built-in OpenSSH client, run PuTTYgen, click Generate, and save the private key. Copy the public key text shown in the box at the top of the window — you'll need it in Step 2.
Open a terminal and run:
ssh-keygen -t ed25519 -C "your.name@otago.ac.nz"
Press Enter to accept the default file location (~/.ssh/id_ed25519), then set (or skip) a passphrase.
No ed25519 support?
If your system or client doesn't support ed25519 keys, use ssh-keygen -t rsa -b 4096 instead.
Step 2: Add your key using ssh-copy-id or Otago OnDemand
The quickest way to register your key is with ssh-copy-id. This copies your public key to the login node in a single command:
ssh-copy-id -i ~/.ssh/id_ed25519.pub <otago-username>@aoraki-login.otago.ac.nz
You will be prompted for your password once. After that, key-based login is ready — skip to Step 3.
- Log in to OnDemand at https://ondemand.otago.ac.nz.
-
From the top navigation bar, select Clusters > SSH Public Key.
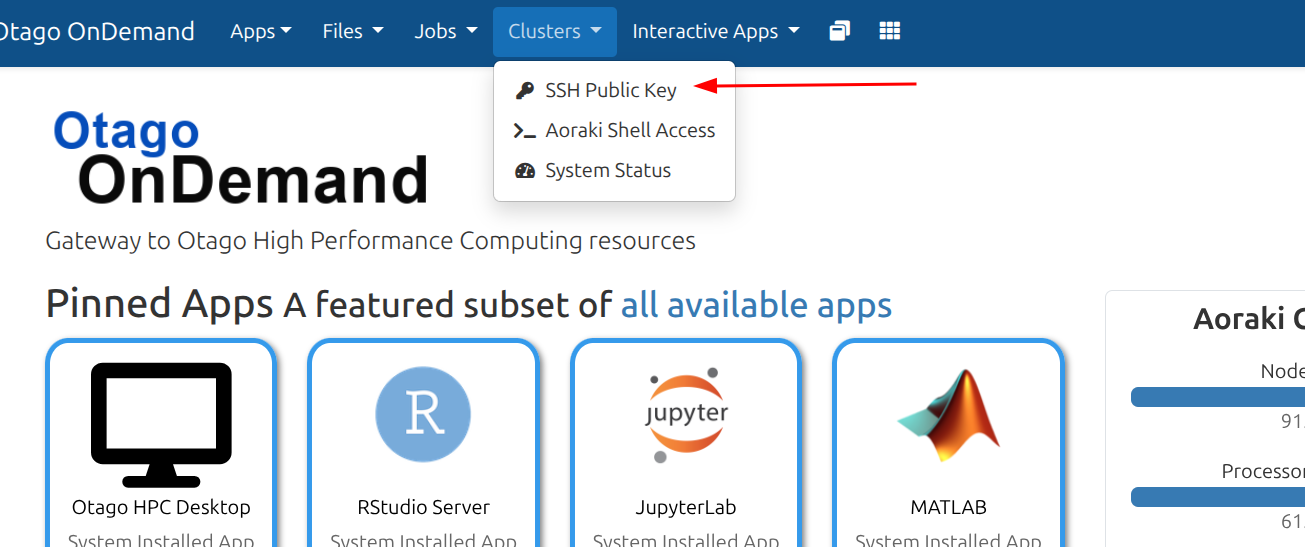
Figure 1: Clusters menu showing SSH Public Key -
On the SSH Public Key Manager page, paste your public key (the full line, e.g.
ssh-ed25519 AAAA... your.name@otago.ac.nz) into the Public key box and click Add.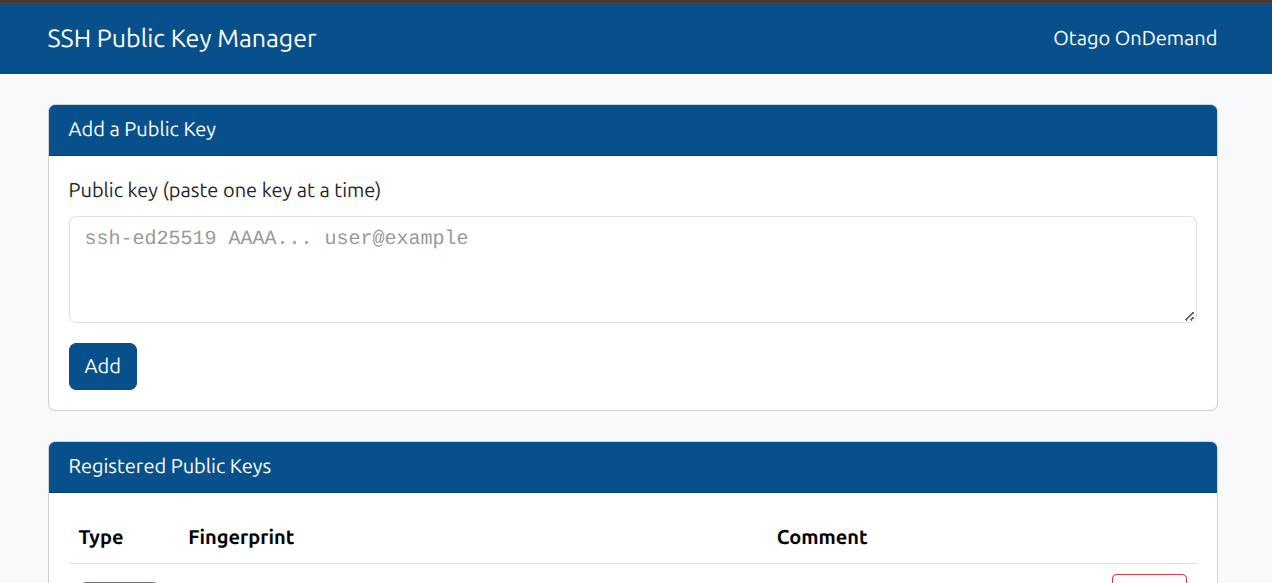
Figure 2: SSH Public Key Manager page -
Your key will now appear under Registered Public Keys.
Step 3: Connect using your key
Once your key is registered, SSH to the login node as normal — if your private key is in the default location, no extra flags are needed:
ssh <otago-username>@aoraki-login.otago.ac.nz
You should connect without being prompted for your password. If you saved your key to a non-default location, specify it with -i:
ssh -i /path/to/your/private_key <otago-username>@aoraki-login.otago.ac.nz
First time connecting
The first time you ssh from a computer you will likely see output extremely similar to:
Terminal
The authenticity of host 'aoraki-login.otago.ac.nz (X.X.X.X)' can't be established.
ED25519 key fingerprint is SHA256:WXAGQmlR5C7rvCOiSSL8PtiuxytA368rjozXXO0NckE.
This key is not known by any other names.
Are you sure you want to continue connecting (yes/no/[fingerprint])?
Warning
Double check the fingerprint matches one of the following:
(RSA) SHA256:pzUx1abRS35sbM9n/3OqMpGiF9zegvlG4jQrr78cGFg
(ECDSA) SHA256:g/BKtsqcMchX7l7YRqDJ98azAumTxzQT0hCCCgVIKxc
(ED25519) SHA256:WXAGQmlR5C7rvCOiSSL8PtiuxytA368rjozXXO0NckE
Type 'yes' and Enter, where you will then be prompted for your password (or need to re-ssh) depending on your ssh client.
Password not showing
When typing in your password when prompted, nothing will be displayed on the screen. Once you have typed your password, press Enter to submit and continue. If you mistyped your password you will be prompted to re-enter it.
SSH within OnDemand
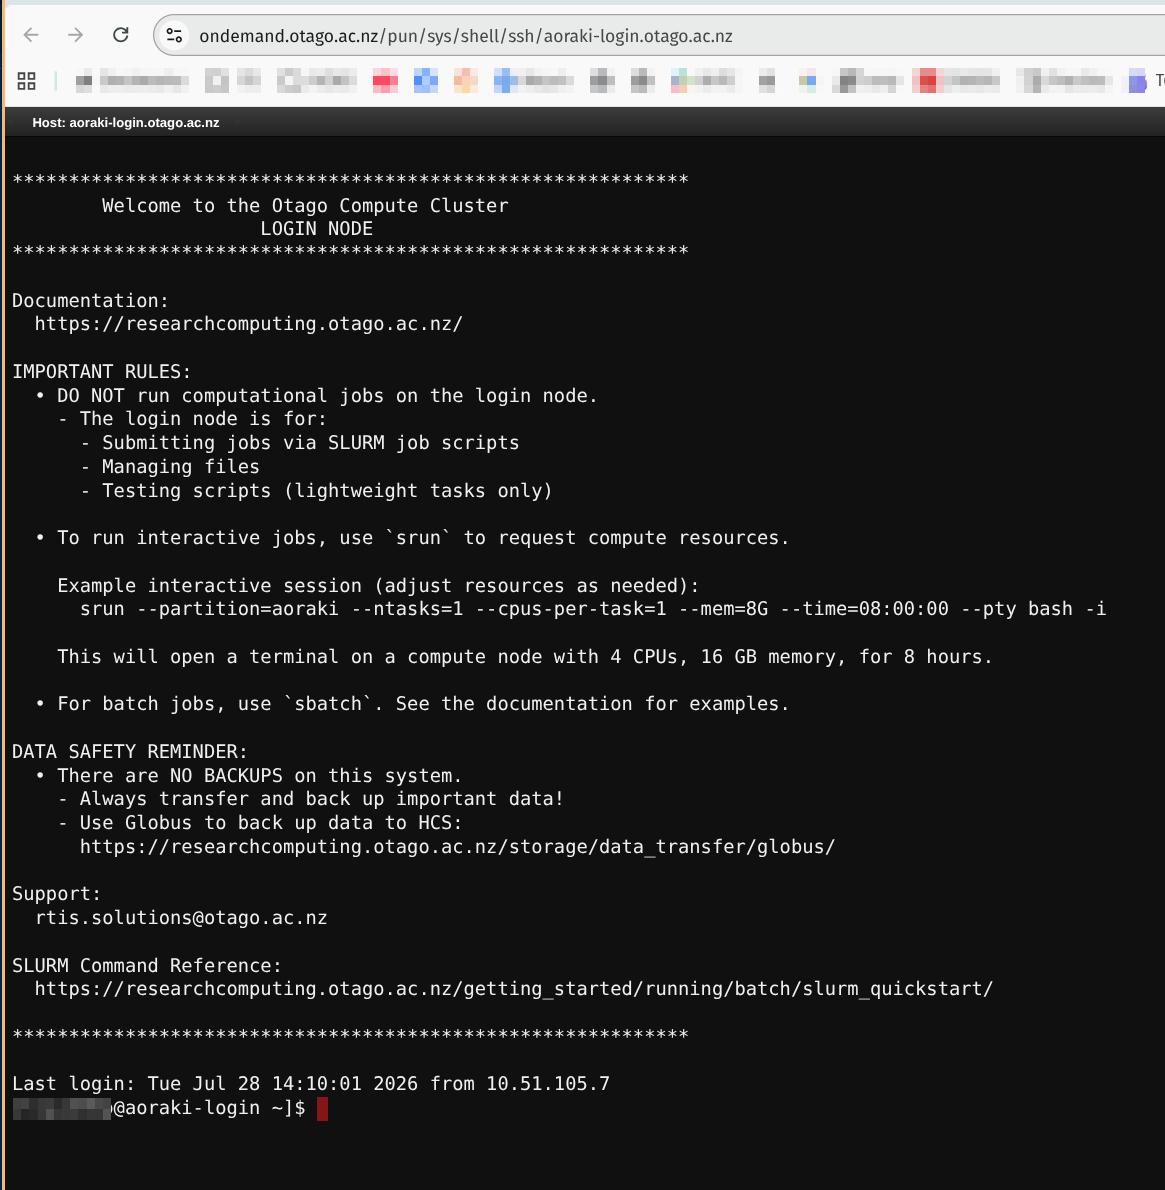
To use the cluster shell access within OnDemand, first connect to the Otago OnDemand web portal and then from the top menu bar select the menu Clusters > Aoraki Shell Access.
You will then be prompted to input your password, similar to SSH through the terminal.